Remington 700 8-40 scope base conversion

Converting a Remington 700 from 6-48 to 8-40 screws

Many custom rifles are offered with upgraded 8-40 scope base screws.  These larger fasteners offer increased strength over the standard 6-48 screws found on most factory rifles.

Reasons for upgrading to 8-40 screws include:

  1. preventing breakage during rough handling
  2. replacing a stripped 6-48 screw
  3. aligning the scope screw holes on an action (in some Remington 700 rifles these holes can be misaligned, incorrectly spaced or off center)
  4. increasing strength for larger cartridges

The Marine Corps uses or has used 8-40 scope base screws on the M40A1, M40A3 and M40A5- which is enough reason for me (jarhead).

In this post, I will be upgrading the scope base on a Remington 700 short-action receiver, however, this process would be similar for most bolt-action rifles.  I’ll be working on a milling machine but it isn’t required.   A carbide end mill is used instead of a drill bit to allow the realignment of holes.

For most applications, a drill press and vise would provide satisfactory results by simply chasing the factory hole. Please note a drill and drill press will only keep the hole location the same and will not allow realignment.  If your holes are in the proper location, Brownells offers a simple Tactical Scope Base Conversion kit with the necessary tools.

I ordered the following items from Brownells:

The contents of Rifleshooter.com are produced for informational purposes only and should be performed by competent gunsmiths only. Rifleshooter.com and its authors, do not assume any responsibility, directly or indirectly for the safety of the readers attempting to follow any instructions or perform any of the tasks shown, or the use or misuse of any information contained herein, on this website.

The action must be completely stripped for this operation.  The barrel must be removed.

I'll begin by attaching my receiver to Holland since bar fixture.  This fixture can be used for a number of operations including drilling a recoil lug pin.  Two 1/4-28 screws secure the action  to the block.
I’ll begin by attaching my receiver to Holland sine bar fixture. This fixture can be used for a number of operations including drilling a recoil lug pin. Two 1/4-28 screws secure the action to the block.
The action is now firmly secured to the block allowing it to be aligned on the milling machine.
Before I begin drilling out my new holes, I make sure the milling machine's vise is square.   with a test indicator.  I managed to get rear jaw within .0005" over its 6" width.
Before I begin drilling out my new holes, I make sure the milling machine’s vise is square with a test indicator. I managed to get rear jaw within .0005″ over its 6″ width.
In order to drill the holes in the proper location, the front center of the receiver needs to be located.  I use an electric edge finder.  This tool lights up when it contacts the edge of the receiver.
To drill the holes in the proper location, the front center of the receiver needs to be located. I use an electric edge finder. This tool lights up when it contacts the edge of the receiver.
I zero my DRO, raise the edge finder and move the action over .100" (the edge finder is .200" in diameter).  This is the front edge of the action.
I zero my digital read out (DRO), raise the edge finder and move the action over .100″ (the edge finder is .200″ in diameter). This is the front edge of the action.
I use a similar technique to locate the center.  I touch off each side to locate it.
I use a similar technique to locate the center. I touch off each side to locate it.

The proper tap drill size for an 8-40 screw is a #28 drill (.1405″). Try finding finding one of those in a short solid carbide end mill.  I used a 9/64″ (.1406″) end mill which is readily available and only .0001″ larger than the recommended tap drill size.

For this action, holes will be centered .190″, 1.050″, 4.700″ and 5.300″ from the front edge of the receiver.  Blueprints of long and short-action Remington 700 receivers are available online.

I am using a 9/64" solid carbide center-cutting end mill. Unlike a drill bit, this tool is rigid enough to cut a new hole and not follow the factory hole. This is important if the holes from the factory were drilled off center, out of alignment, or with the wrong spacing (all of which have been known to occur).
I am using a 9/64″ solid carbide center-cutting end mill. Unlike a drill bit, this tool is rigid enough to cut a new hole and not follow the factory hole. This is important if the holes from the factory were drilled off center, out of alignment, or with the wrong spacing (all of which have been known to occur).
The end mill is run at a high speed and fed slowly.  The idea is to cut a new hole and not follow the old one.
The end mill is run at a high speed and fed slowly. The idea is to cut a new hole and not follow the old one.
All four holes are now drilled.  The third hole from the front was approximately .020" off from where it should have been on the blueprint.
All four holes are now drilled. The third hole from the front was approximately .020″ off from where it should have been on the blueprint.
I now locate the mill over each hole and tap the new 8-40 threads.  A spring loaded tap guide, places pressure on the tap handle and ensures the tap is guided straight into the hole.  Go slow and periodically back the tap off.  The holes toward the barrel threads are harder to tap because the material is tougher from the hardening process.
I now locate the mill over each hole and tap the new 8-40 threads. A spring loaded guide places pressure on the handle and ensures the tap is guided straight into the hole. Go slow and periodically back the tap off to break any chips. The holes toward the barrel threads are harder to tap because the material is tougher from the hardening process.
Normally I use oil for tapping through holes.  For this project I used this tapping paster which worked quite well and was far less messy.
Normally I use oil for tapping through holes. For this project I used this tapping paste which worked quite well and was far less messy.
The finished holes look great.
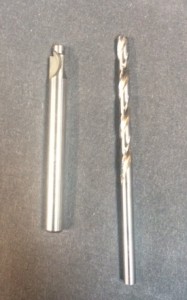
If the scope base is too small for 8-40 screws, you will need to open it up.  This requires a #8 counter bore and #19 drill bit.
If the scope base is too small for 8-40 screws, you will need to open it up. This requires a #8 counter bore and #19 drill bit.  The #19 drill is used to chase the factory holes and guides the counter bore.
8-40 screws fit well in the new base.
8-40 screws are a perfect fit in the counter bored holes.  The un-coated surfaces exposed by the counterbore will be addressed when the rifle is finished.
Time to put it all together.  Guess what- it looks great.  Time to build the rest of the rifle.
All together and guess what- it looks great. Time to build the rest of the rifle.


If you liked this post, check out Project Guns- Gunsmithing articles and posts, or subscribe to this blog (top right corner of page).