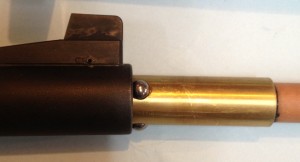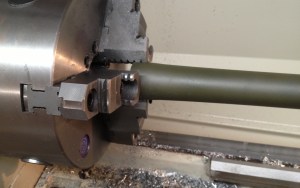

Recently we decided to install “Rem-Choke” style removable choke tubes on two of our barrels. In our “3-Gun Competition Shotgun Build” article, we installed the tubes manually, without a lathe.
All lathe work is conducted on a Grizzly gunsmith’s lathe.
Note: It is important to verify the barrel you are working on is NOT chrome lined. HSS reamers will not work on chrome lined bores. An easy way to check is to see if the interior finish will take cold blue.
For this project, Brownells provided us with the following:
- Win-Choke/Rem-Choke tap 513-044-012
- Rem-Choke reamer 513-046-012
- Bushings for the tap and reamer, these must be sized for your bore
- Starrett electronic calipers 749-008-013
- Manson wall thickness gauge 513-000-066
- Skeets shotgun bore gauge 843-200-146
- Gilchrist choke reamer (you only need this if you plan on removing a fixed choke) 170-100-105
- Do-Drill cutting oil 083-007-016
- The Remington M870 and M1100/11-87 Shotguns: A shop manual 924-500-870
The contents of Rifleshooter.com are produced for informational purposes only and should be performed by competent gunsmiths only. Rifleshooter.com and its authors, do not assume any responsibility, directly or indirectly for the safety of the readers attempting to follow any instructions or perform any of the tasks shown, or the use or misuse of any information contained herein, on this website.
Measuring the wall thickness of the barrel you are working on is critical when installing choke tubes. All chokes, like the “Rem-Choke”, require a minimum wall thickness to be safely installed. Thinwall choke tubes are available for applications in thinner walled barrels. Brownells has more available on this topic here, explaining the minimum requirements for different gauges and tubes.
We are working on two 18″, Remington 870 barrels. These have thick walls. You will also notice that both barrels have Scattergun Technologies front sights installed on them.

While it is possible to measure the inside and outside diameters of the barrel and divide by 2 to estimate final wall thickness, this process assumes the bore is concentric to the outside wall of the barrel. We prefer to measure the wall thickness in multiple locations as an added precaution.


If the barrel decreases in diameter by the muzzle, the fixed choke needs to be removed. An adjustable reamer, shown in the parts list above, can be used to accomplish this. In this case, neither barrel had a fixed choke, eliminating the need for this step.

We suggest referencing “The Remington M870 and M1100/11-87 Shotguns: A shop manual” by Jerry Kuhnhausen for further reading on chokes. In addition to a complete overview of choke tube installation, the manual details two different lathe set ups for reaming barrels.


If you liked this post, check out Project Guns- Gunsmithing articles and posts, or subscribe to this blog (top right corner of page).


You must be logged in to post a comment.