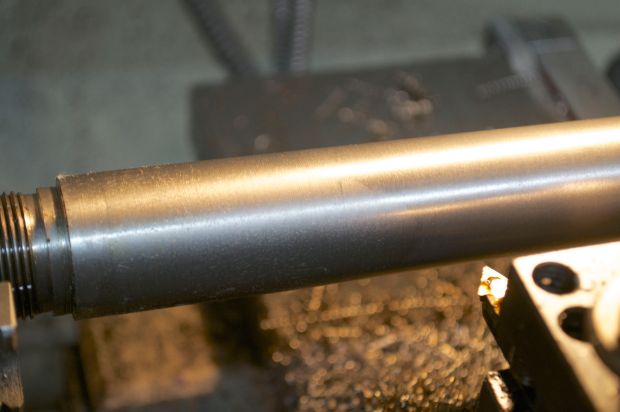
How to taper a rifle barrel

In this post I’ll be turning a straight taper on a rifle barrel.  The barrel is an unturned (straight 1.250″ diameter) gunsmith blank.  A straight taper is the easiest taper to cut on a barrel.  Barrel with curved profiles, such as sporter contours, are more challenging.  Check out this link to see a few different examples of barrel contour specifications.

This barrel is a Shilen Match grade, 1:10 twist, stainless steel blank.  It was used for my post 308 Winchester / 7.62x51mm NATO: Barrel Length versus Velocity (28″ to 16.5″).  Because of this, it has already been threaded, chambered and cut to 16.5″ in length.  Ideally, you’d want to taper the barrel before it was threaded and chambered.  You would also want to have at least an inch extra on each end.

If your lathe is equipped with a tapering fixture, tapering is a breeze.  For this post I will not be using the tapering fixture, instead I will be tapering the barrel using the offset tail stock method.  First, I’ll need to determine how much the barrel needs to be tapered.

I decided on trying to copy the barrel taper found on the DARPA XM-3 rifle.  According to “The Darpa XM-3” by Steve Reichert, the 18.5 inch long barrel has a modified Hart #7 contour.  It has a 2″ straight shank and a muzzle diameter of .850″.  From his article, I wasn’t able to determine if the shank is 1.250″ or 1.200″, so I elected to use 1.200″. Obviously, since my barrel is only 16.5″ long I can’t make an exact copy, but I can copy the taper.

Since the source states a 2″ shank and 18.5″ overall length, I know the taper is 16.5″ long (18.5″-2″=16.5″).  At the shank, it is 1.200″ and the muzzle is .850″.  This means the barrel tapers .350″ (1.200″-.850″=.350″) over 16.5″.  Since the lathe will remove material on both sides of the barrel, I will divide this in half (.350″/2=.175″).  To determine the taper per inch, I simply divide this number by the length of the taper (.175″/16.5″= .0106) and get a value of .0106″ per inch of barrel.  Since my blank is 16.5″ long, I’ll need to offset the end of the barrel .1749″ (16.5x.0106″=.1749″).

Finally, I’ll need to calculate the muzzle diameter.  Since the XM-3 has a .850″ muzzle diameter at 18.5″, I need to determine its diameter at 16.5″.  I simply multiply the taper per inch, by 2 for its location on the barrel (2″ from the muzzle), and by 2 again since this is the taper on the radius for a value of .042″ (.0106″x2X2=.042″).  .042″ is added to .850″ (.850″+ .042″=.892″) for a final muzzle diameter of .892″.

I’ll be using the following parts from Brownells:

The contents of Rifleshooter.com are produced for informational purposes only and should be performed by competent gunsmiths only. Rifleshooter.com and its authors, do not assume any responsibility, directly or indirectly for the safety of the readers attempting to follow any instructions or perform any of the tasks shown, or the use or misuse of any information contained herein, on this website.

All lathe work is conducted on a Grizzly gunsmith’s lathe.


This unturned Shilen blanks has already been threaded and chambered for 308 Winchester.  It is 16.5 inches long.
This unturned Shilen blanks has already been threaded and chambered for 308 Winchester. It is 16.5 inches long.
The blank is mounted in the lathe and the saw cut muzzle end is squared.
A 60-degree center drill is held in a floating reamer holder.  The live pilot is sized to the bore diameter.  The cut made by the center drill will receive the live center.
A 60-degree center drill is held in a floating reamer holder. The live pilot is sized to the bore diameter. The cut made by the center drill will receive the live center.
The lathe's chuck is removed and a dead center is installed in the headstock.
The lathe’s chuck is removed and a dead center is installed in the headstock.
The barrel is held between centers.
A shop made drive dog will turn the barrel.
I will cut the taper  using an offset tail stock.
I will cut the taper using an offset tail stock.
Opposing screws on the sides of the tail stock allow it to move.
The dial indicator allows me to measure how far the  barrel is offset.
The dial indicator allows me to measure how far the barrel is offset.   Since the muzzle end it being supported by the tailstock, I will be moving the barrel towards the tool post.  I will offset the tailstock .175″ (see calculations above).  Checking the taper with the dial indicator against the barrel will ensure the set up is correct.
The witness marks on the tailstock show how far it has moved.
Note the side of the tailstock is now off center.
With the tail stock offset, I can begin tapering the barrel.  I make a series of fairly heavy cuts with a carbide insert tool at 220 RPM.  My cits are approximately .050" deep.  I've found this provides the best finish when I work on barrels between centers.
With the tail stock offset, I can begin tapering the barrel. I make a series of fairly heavy cuts with a carbide insert tool at 220 RPM. My cuts are approximately .050″ deep. I’ve found this provides the best finish when I work on barrels between centers.
Once I am close to the finished diameter, I take a light, .005", cut to remove any tooling marks.
Once I am close to the finished diameter, I take a light, .005″, cut to remove any tooling marks.
I remove all oil from the barrel and use a lathe file coated in chalk to smooth the barrel.
I remove all oil from the barrel and use a lathe file coated in chalk to smooth the barrel.  Oil and files do not mix.
I follow the file with 220 grit abrasive cloth and oil.  I find this gives an adequate finish for Cerakote applications.  If I wanted a different finish, I would use finer abrasives.
I follow the file with 220 grit abrasive cloth and oil. I find this gives an adequate finish for Cerakote applications. If I wanted a different finish, I would use finer abrasives.
The taper is looking pretty good.
Time to move the tail stock back into position. I use a .0001" indicator and a dead center in the tailstock to indicate it in the proper location.
Time to move the tail stock back into position. I use a .0001″ indicator and a dead center in the tailstock to indicate it in the proper location.
The barrel is mounted in the lathe with the tail stock aligned.  I use a high-speed steel insert tool to turn the straight two inch shank on the chamber end of the barrel.  After the cut is made, I use a file and abrasive cloth to refine the finish.
The barrel is mounted in the lathe with the tail stock aligned. I use a high-speed steel insert tool to turn the straight two inch shank on the chamber end of the barrel. After the cut is made, I use a file and abrasive cloth to refine the finish.
All done.  The barrel is tapered.  I still need to cut a new crown.
All done. The barrel is tapered. I still need to cut a new crown.
It looks good threaded into the action.
Finally with a Surefire brake installed.

It is too short to work with the TACMOD chassis forend (above)so now it is on the MDT LSS chassis (below).  The bottom picture is the first group I shot with the rifle, 5-shots, .785″ including cold bore.

MDT LSS right sideLSS group 785

If you liked this post, check out Project Guns- Gunsmithing articles and posts and subscribe to Rifleshooter.com (top right corner of page).